Skip to content
MODELSUITEAGENCY OS

Talent Management

Shoot Prep

Overview

Every shoot, perfectly prepared.

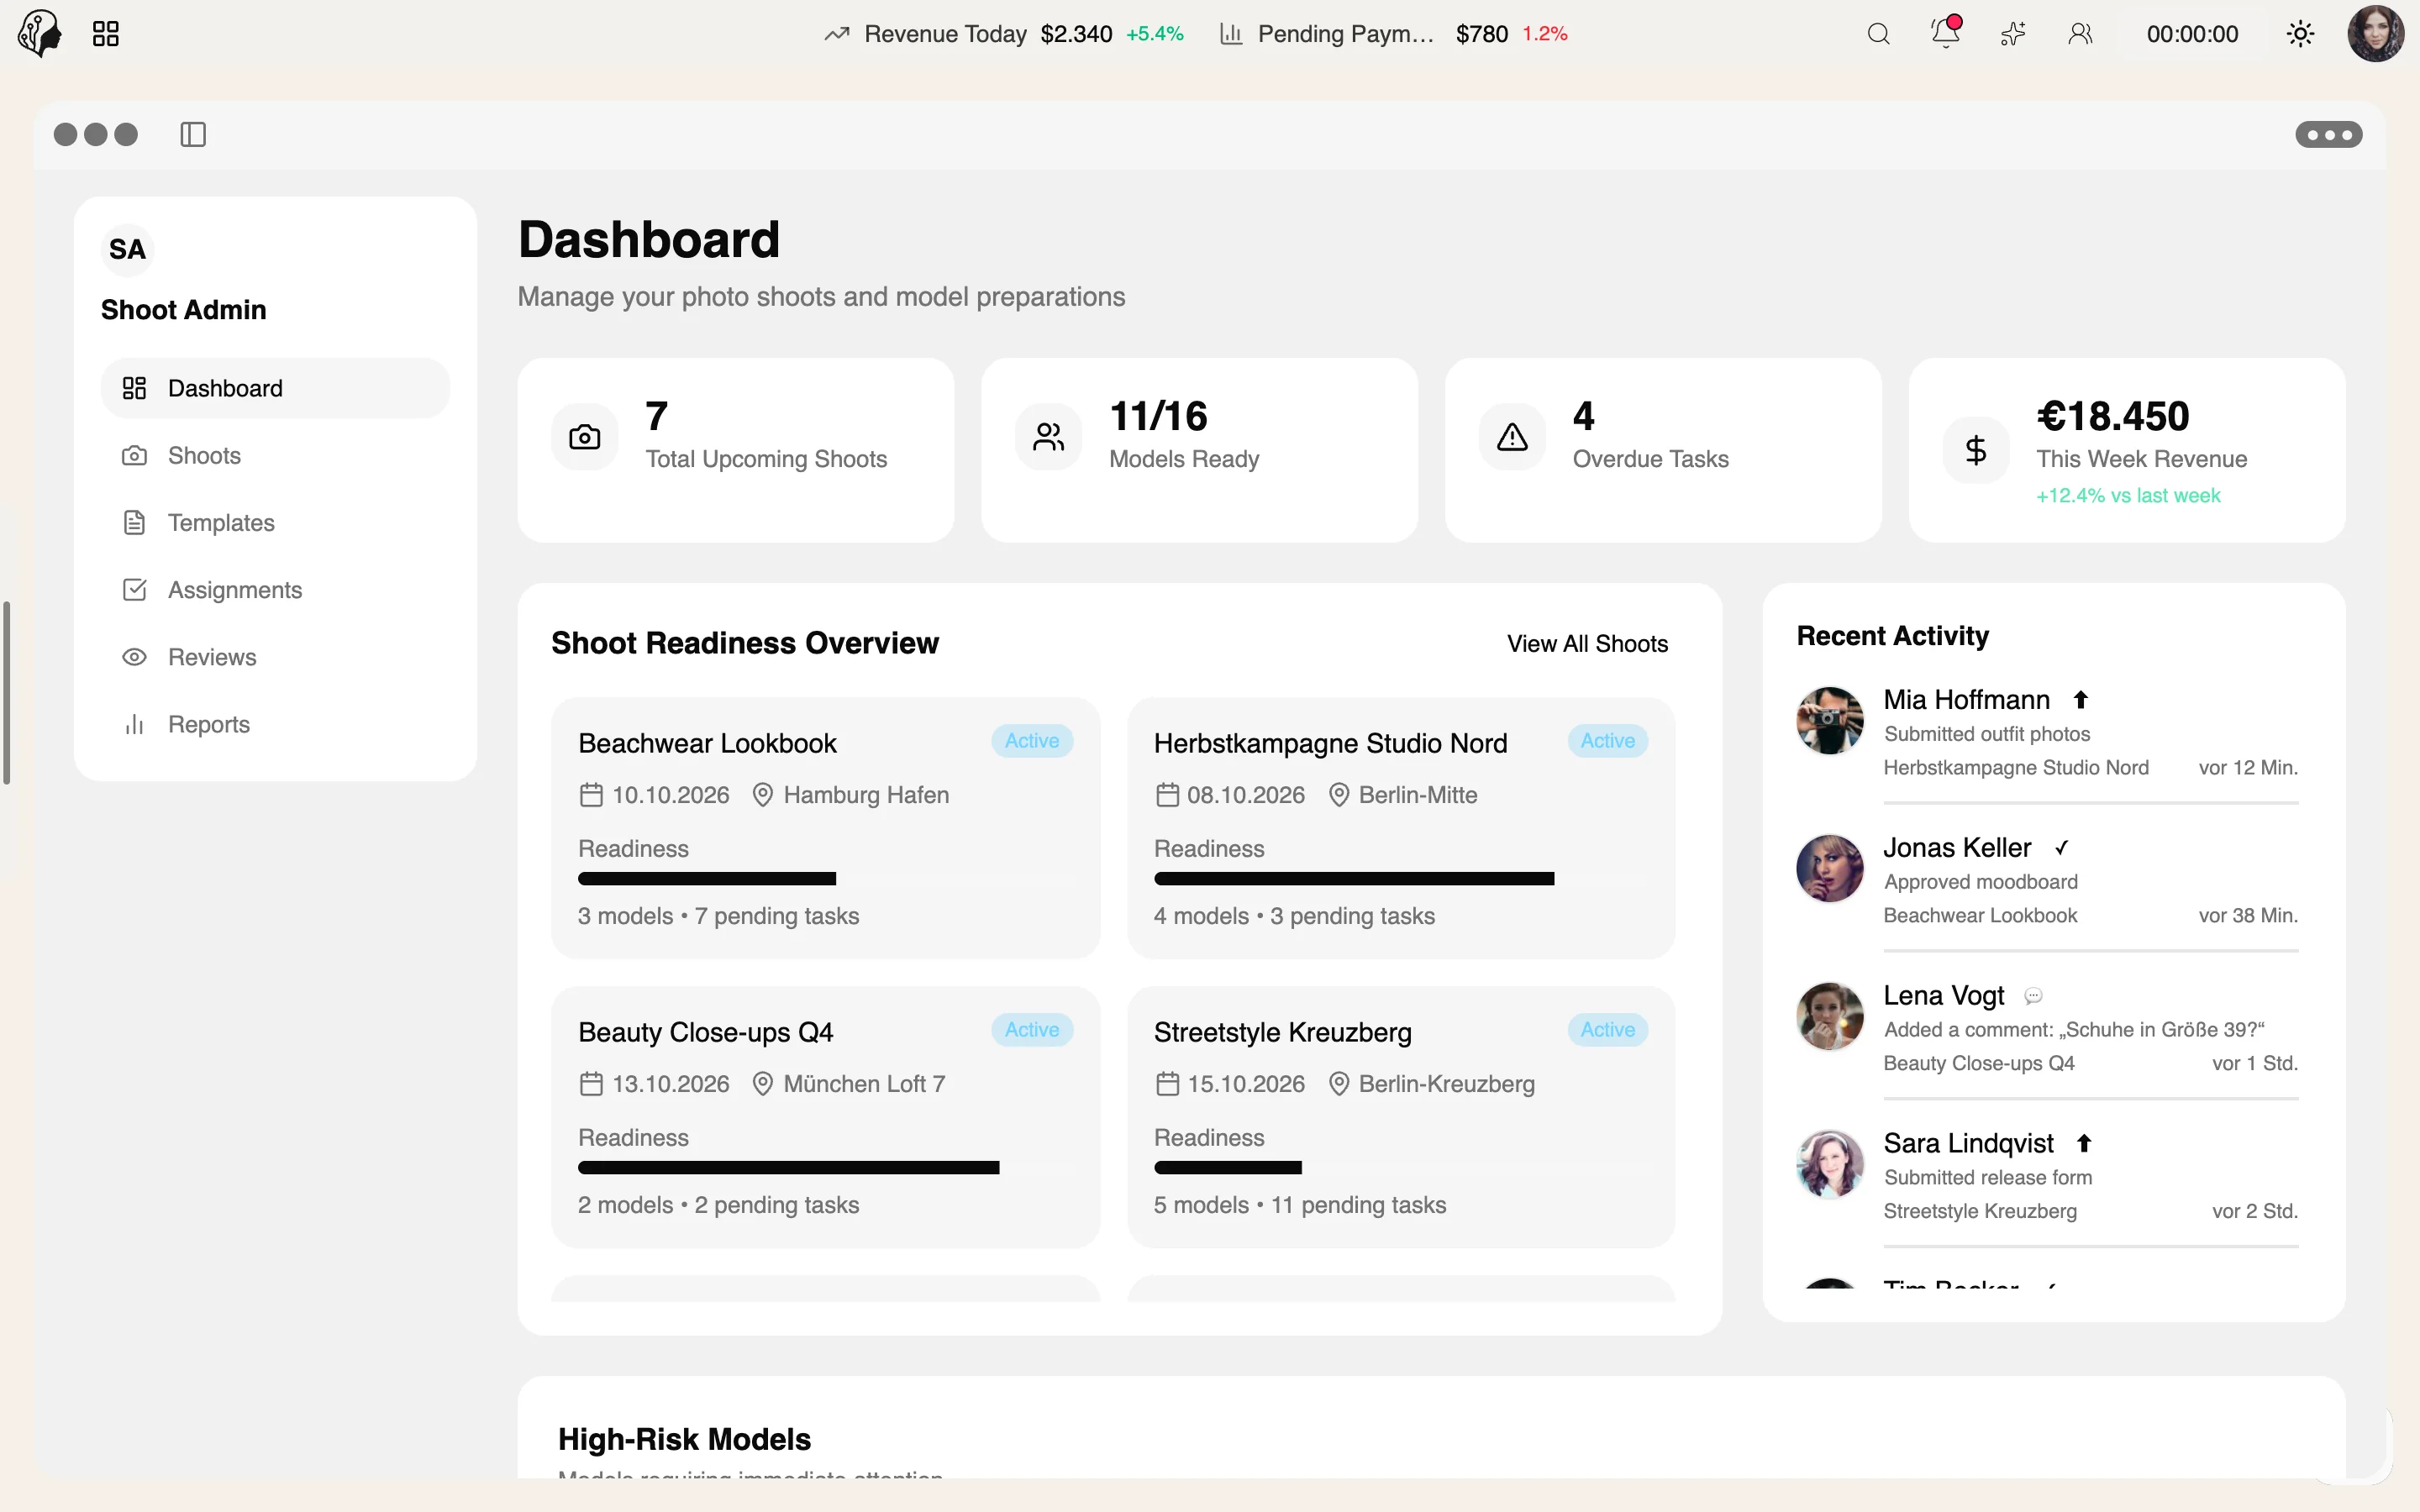
Master checklists with tasks, packing lists and media requirements, assignment to models, review of every submission and a readiness dashboard with risk alerts.

See Shoot Prep live
ModelSuite Shoot Prep

4 features

In detail

What the module does, point by point.

  1. 01

    Templates

    Master and derived templates with lockable modules.

  2. 02

    Readiness Dashboard

    Who is ready, who is falling behind – with a nudge function.

  3. 03

    Review Workspace

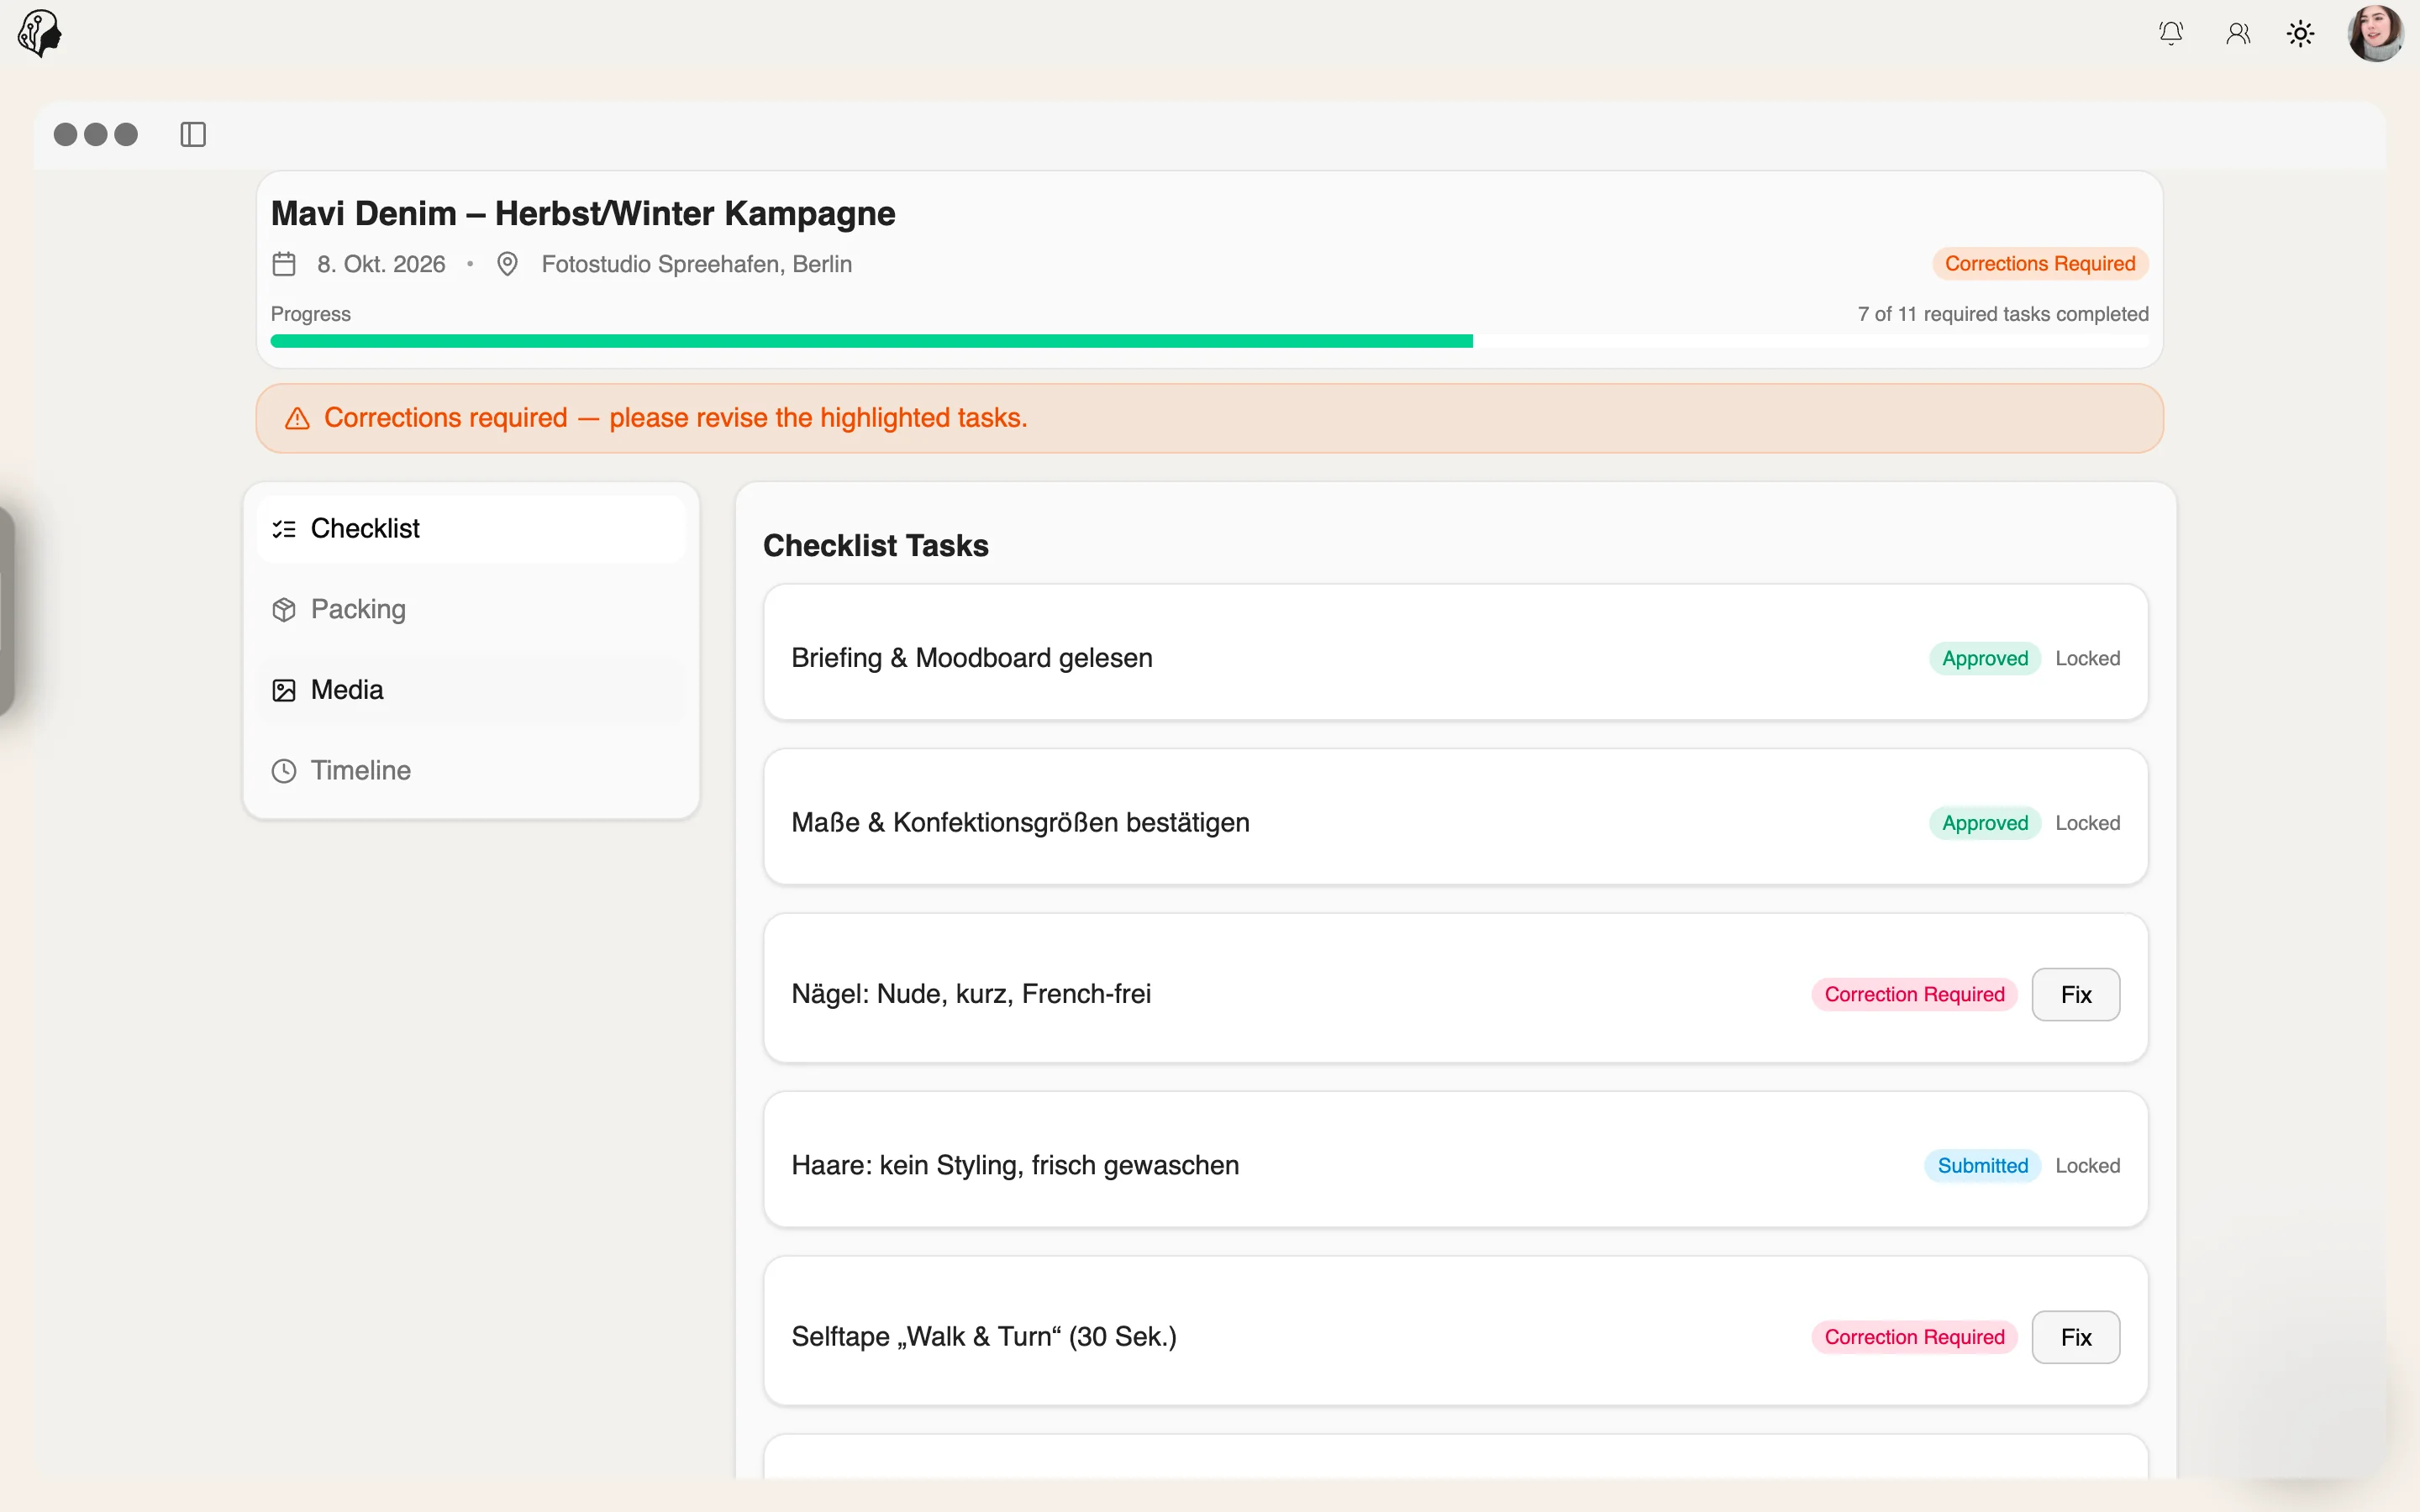
    Approve submissions or request corrections.

  4. 04

    Reports

    Time to approval, correction rounds, PDF export.

Recently added

All news →
  • New

    Shoot system

    Shoot Prep with templates, reviews and a readiness dashboard.

ModelSuite Shoot Prep – another view

How Shoot Prep works

Three steps · from template to approval

  1. 01

    Choose a template

    Master checklists with tasks, packing lists and media requirements – as master or derived templates with lockable modules.

  2. 02

    Assign

    The checklist goes to the model; the readiness dashboard shows who is ready and who is falling behind.

  3. 03

    Review

    In the review workspace, approve submissions or request corrections.

Questions about Shoot Prep

What goes into a checklist?

Tasks, packing lists and media requirements, so every shoot is fully prepared.

What is the difference between master and derived templates?

Derived templates build on a master. Modules can be locked so the essentials stay unchanged.

How do I know whether a model is ready?

The readiness dashboard shows each model's status and flags risks. Anyone falling behind can be reminded with the nudge function.

What happens to the models' submissions?

They arrive in the review workspace, where you approve them or request corrections.

All questions & answers →

In practice

Part of these workflows

Where the module shows up in everyday work – step by step.

A shoot from start to finish

  1. Step 01 · Plan

    Create the shoot with location and date in Shoot Prep, assign a template.

  2. Step 02 · Prepare

    The model works through checklist and packing list in the portal.

  3. Step 03 · Align

  4. Step 04 · Collect

  5. Step 05 · Refine

  6. Step 06 · Publish

View the full flow →

By Invitation

Experience ModelSuite

A personal tour of the platform – tailored to your agency